Building the Second-Worst ZX Spectrum Emulator in the World with Perl
19 Mar 2025
Update 2025-04-17 Joaquín Ferrero drew my attention to some prior art, see: ooblick's Perl Spectrum Emulator - very nice!
Introduction
I've always been interested in the idea of building a small computer emulator, but it always seemed to be within the realms of bizarre science experiment meets arcane magic trick. Software-defined silicon chips, talk of "precise timings" or "t-state accuracy", translating keyboard/mouse/disk/etc. I/O, wondering how you turn the flapping of a bit on a port into something that beeps on modern audio hardware, and so on. It all seemed a bit intimidating, and other things held my interest.
I got thinking about this again recently, with a desire to produce interesting things for the ZX Spectrum Next, so I thought "I wonder how far I can get with a Perl script?" Among Perl's superpowers is whipuptitude - the ability to draw on expressive language features and available libraries on CPAN to solve annoying problems and get things done - you can quickly whip things up. Can I "whip up" a speccy emulator in Perl?
Oh, an angry mob ... hello! Let's be realistic here, I'm probably not going to bang out an accurate representation of the ZX Spectrum over the course of an idle evening, so let's set our sights lower. Let's build something that just about plays a ZX Spectrum game. Silently, in all likelihood. Let's build the Second-Worst ZX Spectrum Emulator in the World.
The Worst ZX Spectrum Emulator in the World
In order to build The Second-Worst ZX Spectrum Emulator in the World, I think we should start with The Worst ZX Spectrum Emulator in the World, if only to explore some ideas on what an emulator does. Let's start with the Z80 CPU.
CPU
CPUs operate via the fetch-decode-execute cycle. This loop fetches instructions from memory pointed to by a Program Counter (PC). Depending on what this instruction is, additional parameters may also be fetched. There is enough information here to to increment the PC to point to the next instruction. The decode stage decides which part of the CPU should should handle the instruction, which is then executed with any retrieved parameters. This is an inaccurate and hand-wavey description to further the needs of this post - I wouldn't use it as the basis for a chip design.
We could implement a loop which fetches from a blob of memory, looks up instructions in a table, executes an implementation of these instructions along with any parameters, maintains the PC correctly (instructions will also have different numbers of bytes and parameters, so the PC will need to take account of this), and so on... but we're whipping up here.
David Cantrell's CPU::Emulator::Z80, is a Perl-based Z80 CPU emulator which should get us moving. An instance of this emulator in the simplest case needs a memory string, some intial values for registers, and the number of I/O ports.
We could load this CPU up with the Spectrum ROM and a pristine 48K of RAM, make sure we can boot up to the copyright notice, but let's pretend it's Christmas morning nineteen-eighty-splat - "I wanna see the games!" One of the simpler file formats for storing Spectrum games is the SNA snapshot, a direct dump of RAM and registers. Let's see what we can do with that.
RAM and Registers
We can start by getting a snapshot filename from the command line, reading the 27 byte header and the rest of the file into our "RAM":
my $sna = $ARGV[0];
open my $fh, '<:raw', $sna;
read $fh, my $header, 27;
read $fh, my $ram, 49152;
Parsing the registers and so on out of $header is simple with unpack.
We just need to know whether the value is 8 bit, e.g. $Border, or 16 bit,
e.g. $SP.
my (
    $I,
    $HL_, $D_, $E_, $B_, $C_, $A_, $F_,
    $HL,  $D,  $E,  $B,  $C,  $IY, $IX,
    $Int,
    $R,
    $A, $F, $SP,
    $IntMode,
    $Border
) = unpack '
   C
   S C C C C C C
   S C C C C S S
   C
   C
   C C S
   C
   C
', $header;
We now have a game in memory, plus much of its initial state.
ROM
The ROM contains routines for co-ordinating facilities of the computer, startup code, as well as a BASIC interpreter.
We want to emulate the ZX Spectrum 48K, so we need a ROM dump for that model. I won't get into the legal situation with ZX ROMs here, but they are readily available online. My ROM file is 'spec48.rom', so let's read it's full 16K:
open $fh, '<:raw', 'spec48.rom';
read $fh, my $rom, 16384;
Creating the CPU
The Spectrum's memory map is fairly simple. It is a single 64K bank. The
first 16K is mapped to the ROM, the remainder is RAM. The RAM contains some
system variables and buffers, screen memory, and the program. For our
purposes we can simply concatenate $rom and $ram to achieve a complete
memory map.
The Spectrum uses 16-bit I/O port addresses, so we'll need to set the number of ports accordingly.
my $cpu = CPU::Emulator::Z80->new(
    memory   => $rom . $ram,
    ports    => 65536,

    init_A   => $A,
    init_B   => $B,
    ... # initialising more registers here
    init_HL_ => $HL_,

    init_SP => $SP,
    init_PC => 0x72,
);
Something to note is we don't get a PC value from the snapshot file.
The way the snapshot format works is we get a Stack Pointer (SP) value which points to a
memory location containing the address of the next instruction.
The snapshot should be kicked off by issuing a
RETN instruction (ED 45), which is used
to return from a Nonmaskable Interrupt (NMI) routine. RETN pops PC off the
stack, allowing execution of the game to resume. A RETN instruction can be found in the
ROM at offset 0x72, so we can set our PC to that address.
Running the Program
You may have noticed that no I/O devices have been set up, so we can't exactly play a game just yet. We also have no graphics output, so this is so far a non-interactive and headless Spectrum emulator. What we can do is run the CPU and grab screen dumps to see what's going on.
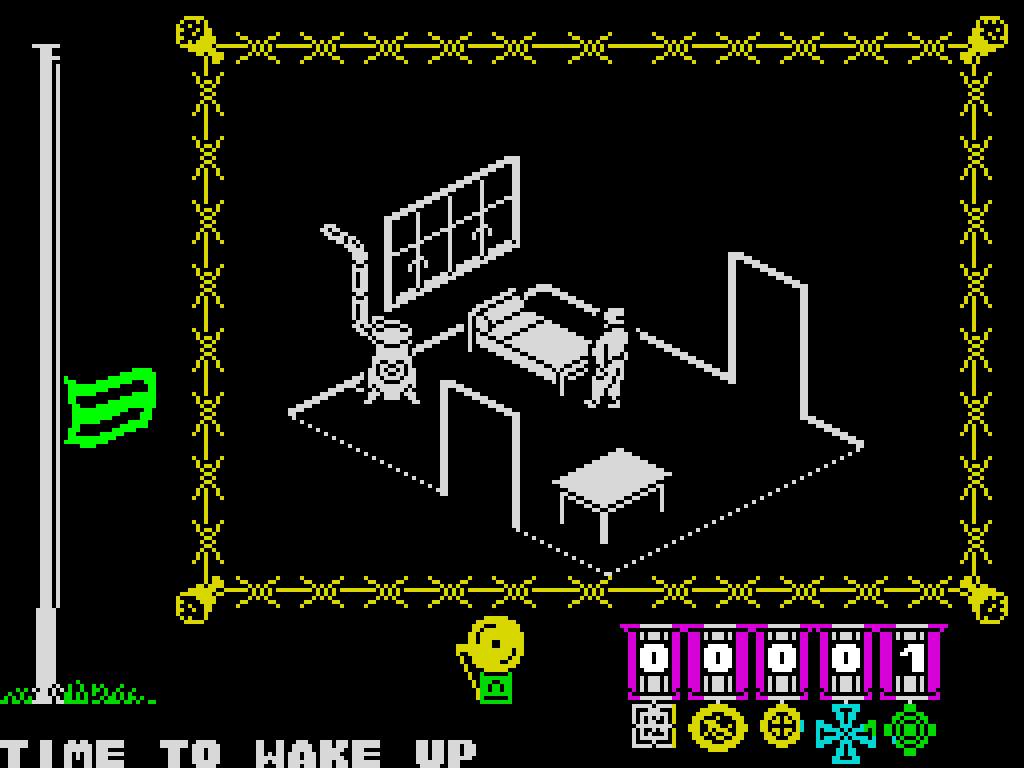
Let's run it with a snapshot of The Great Escape, which has an animated intro screen featuring a flag raising up a flagpole. We can take some periodic screenshots and see if there's progress to indicate the program running successfully:
sub screenshot( $filename = 'screen.scr' ) {
    open my $fh, '>:raw', $filename;
    print $fh join '', map { chr( $cpu->memory->peek8( $_ ) ) } 16384..16384+6911;
}

screenshot( 'tge1.scr' );
$cpu->run( 5_000_000 );
screenshot( 'tge2.scr' );
$cpu->run( 5_000_000 );
screenshot( 'tge3.scr' );
Here we take a screenshot of the initial state of the machine, run five million
instructions (note: instructions, not clock cycles), take a second screenshot,
run five million more instructions, and take a final screenshot. The screenshot
function uses peek8 (equivalent to a typical BASIC PEEK) to read
single bytes from memory. The chr function ensures these are stored as
characters, since the peek8 method returns integer values. The built-in
function chr converts the up-to-three bytes returned by peek - the perl integer
value representing the memory contents - into a single byte value (I should point
out that the integer is stringified by the join operation, which is why we
have three bytes).
chr ( 0b01 . 0b10 . 0b11 ); # "123" returns ASCII '{'The SCR file format simply a dump of screen RAM contents. Screen RAM begins at
address 16384 and is 6912 bytes long. It is split into an area defining pixel
data, and an area describing attribute data per 8x8 square - foreground
and background colours, and FLASH and BRIGHT flags.

While we can see the program appears to run successfully, there is a serious problem (besides the lack of interactivity). What would have taken just a few seconds on the Spectrum took a few minutes on my laptop. I suspect we don't yet have a viable emulator for playing games, and implementing a CPU loop in Perl is perhaps not ideal for this particular use-case. It will likely continue to serve us well for testing ideas and validating assumptions.
Source code for this stage of the emulator
Replacing the CPU
Manuel Sainz de Baranda y Goñi's Z80 is a fast and portable implementation of the Z80 CPU written in C. It appears to have a simple interface, and a means for adding I/O port facilities. It has also been used for a number of ZX Spectrum related projects, which I can use as a refer...
OK, OK, I admit it - This was the first result when I searched for "Z80 CPU Emulator". It's written in C (which is easy to bind), and I liked the vibes. I'm going to refer to this library as "redcode's Z80" from here out, as the name "Z80" alone is a little ambiguous.
A difference between this library and CPU::Emulator::Z80 is that all memory access is mediated by your program, not the CPU emulation. This means that alongside callbacks for port I/O, we also have callbacks for reads and writes of memory addresses. This may end up presenting performance problems. Array accesses in in Perl are pretty fast, so I guess we'll dive in and see!
You may have noticed another important different between redcode's Z80 and CPU::Emulator::Z80 - it's not on CPAN. In the Before Times, this would likely have spelled the end for this project. I would need to break out the compiler and start chiseling a set of XS Macros out of rock. Rock composed of my patience and my ability to wrangle C - small and very fragile rock.
This would also have been a swift and sharp departure from the land of whipuptitude, and from its neighbour, the land of fun.
Enter Platypus
Thankfully Graham Ollis' FFI::Platypus allows us to pick an existing library and create ad-hoc bindings to the pieces we need right in our Perl script. In Perl.
It has support for callbacks, pointers, structs and unions, and practically any combination of types you can think of. While having some grasp of low-level concerns is useful, it's not absolutely necessary once you can read docs and/or C header files.
Not requiring a compiler is a definite bonus - a killer feature. Not only does it make the workflow a lot smoother, you can also explore the library and ways to bind it in a REPL or debug session (though if you do, prepare for crashes when you get a function signature wrong).
Interactivity - The ULA
An Uncommitted Logic Array (ULA), also called a gate array, is a chip which, facilitated by the ROM, gathers together useful facilities for your computer which are not handled directly by the CPU. These facilities can include handling the keyboard and storage devices, generating video frames, or handling peripherals on external ports - printers, modems, MIDI devices...
This is the piece we need to emulate in order to approximate the functioning of the Spectrum. Being able to type on the keyboard, and see the effect of those keypresses on the screen is just about all that's needed to play a game. It might also be nice to have soun... (QUIET YOU! - Ed).
The Z80 communicates with the ULA via its I/O ports. These are implemented in redcode's Z80 (and in CPU::Emulator::Z80) by attaching callbacks to I/O port addresses. These ports may be read from or written to, and the appropriate callback is required for each operation.
As for what these callbacks will actually do, we're going to need something which can read the keyboard and display graphics on a modern operating system - I'll call this the "host" from now on. I have dabbled with SDL in the past, which is fantastic for cross-platform game and engine development, though it's a bit low-level for my needs here. It doesn't feel whippy or uppy enough.
Enter raylib
The raylib games programming library has the word "enjoy" right in its mission statement. It has a Simple but extensive API, and easy means to read the keyboard and display graphics.
Chris Prather's binding for the raylib game programming library allows us to kick off pretty much immediately. The Raylib::App example shows off at least some of the facilities we need - framerate control and drawing. Input from the keyboard is also easily retrieved.
The Keyboard
I won't go into much detail here on reading the Spectrum keyboard matrix, but the short version is we need a callback to respond to read requests on port 0xFE. While I said the Spectrum uses 16-bit I/O addressing, this is treated as a single port by the ULA, with additional bits on the data lines used to decide which part of they keyboard matrix to read. The keyboard is split into 8 half-rows of 5 keys each, for a total of 40 keys in the matrix.
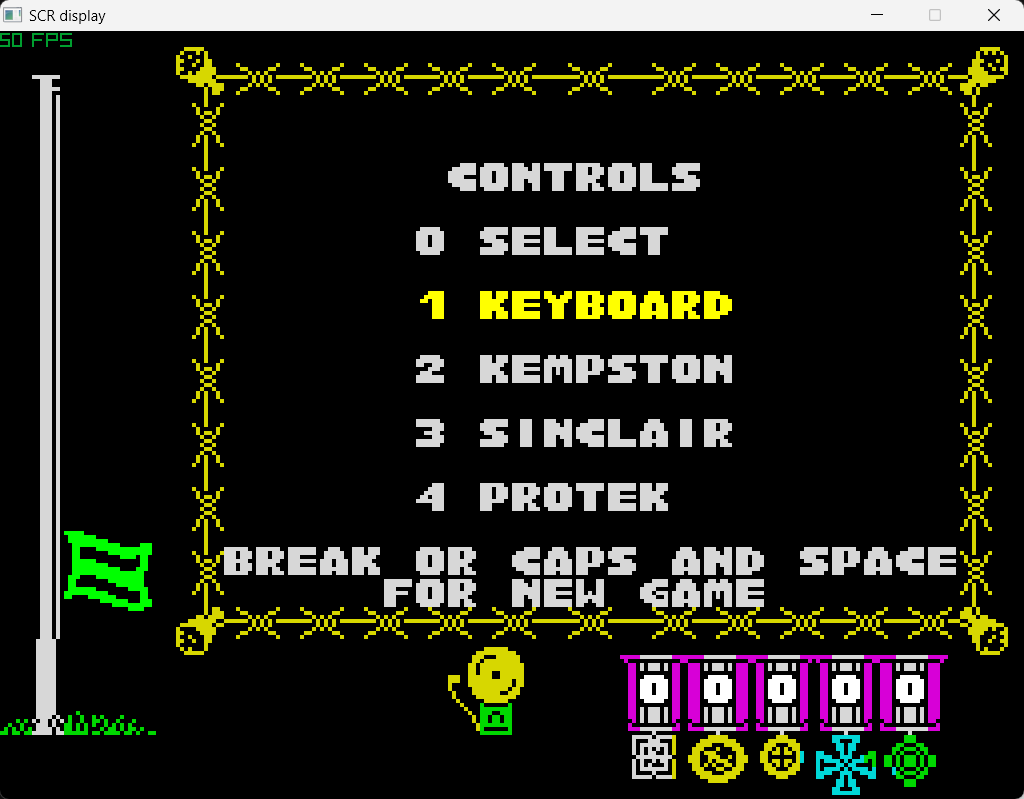
We can revisit our headless emulator to experiment with this. For the purposes of defining a callback, we can treat the port address as 16-bit. This means we want to respond to reads on port 0xEFFE, which is a keyboard read request for keys '6' to '0'. Referring to the screenshot of the menu screen above, we want to press key '0'.
We don't need to check if a key is pressed on the host, we can just unconditionally return '0' and see if the game starts (with some minor complications). That ends up looking like this:
$cpu->add_input_device(
    address => 0xf7fe,
    function => sub {
        state $have_set_controls;
        return 0b11111 if $have_set_controls;
        $have_set_controls = true;
        return 0b11011;
    }
);
$cpu->add_input_device( address => 0xeffe, function => sub { 0b11110 } );
$cpu->add_input_device( address => 0xfefe, function => sub { 0b11111 } );
$cpu->add_output_device( address => 0x00fe, function => sub { } );
The first callback sets the menu option to use Sinclair joystick (option 3). If we leave
this option on keyboard controls, the game will prompt for a keyboard layout
rather than just starting the game. The address 0xf7fe is a request to read
keys 1-5 (or 5-1 depending on how you order bits on the bus). It returns the keys pressed as a bitmask. As
the data pins are pulled high, active keys are set to zero, so 0b11011 means
the key '3' is pressed.
The game's menu code only falls through to check for keys 6-0 if none of 1-5 are
pressed, so the callback for 0xf7fe has a guard to only press '3' once,
else send 0b11111 - no keys pressed.
The callback for 0xeffe handles keys 6-0. We always return 0b11110 here,
meaning '0' is pressed.
The address 0xfefe is a request to read keys 'Caps-Shift' to 'V'. This is
probably part of a check to see if 'Break' is pressed - this keypress is a
combination of 'Caps-Shift' + 'Space'. If we pressed 'Caps-Shift', we might
expect an additional read on 0x7ffe which is a read request for a keyboard
row which includes 'Space'. We instead send 0b11111 here - all keys off.
A no-op callback is added to output port 0x00fe to reduce warnings in the
terminal. I suspect these are calls to oscillate the beeper, though I'm not sure.
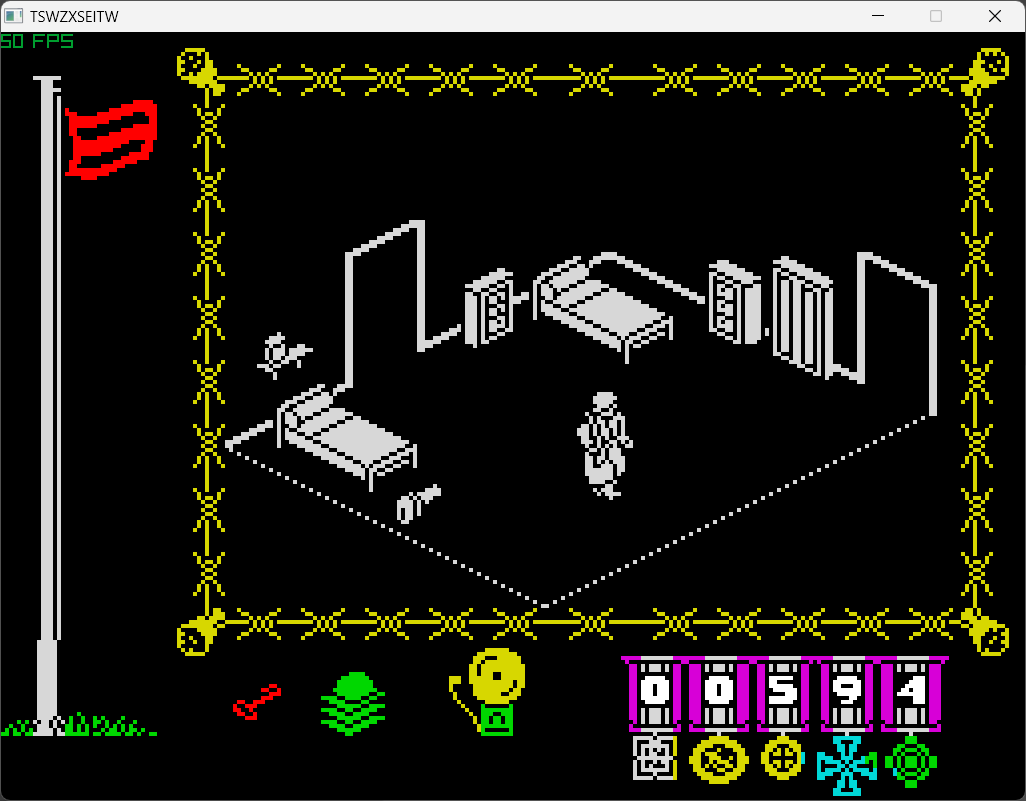
The end result of all this is that one of our screen captures contains the following screen shot:
Video Frames
I have so far been using software like ZX Paintbrush to view screens dumped by the emulator. We will need to look at decoding these directly in order to display them in real time.
Pixel data starts at address 16384 (0x4000), and is 192 lines of 32 bytes for a
total of 6144 bytes. Each byte contains the pixels in the order they appear on
screen.
The 192 lines are not arranged sequentially as you might expect from a bitmap. Instead the screen is divided into three horizontal sections. Lines within these sections are ordered by their position in their respective 8x8 character square. The first line of every character in the current third of the screen appears before the second line, and so on. Some arithmetic may be performed on the memory address to convert it to screen-space co-ordinates.
After the 6144 bytes of monochrome pixel data is 768 bytes of colour (or
attribute) data. Each byte refers to an 8x8 character, and has 3 bits for
foreground colour (called INK in Spectrum parlance), 3 bits for background colour (PAPER),
and 1 bit each for BRIGHT and FLASH. The arrangement of these bytes is
simpler than the pixel data - they are stored sequentially in the order they
appear on screen - reading order. 3 bits of colour, combined with the BRIGHT flag gives 15
possible colours ("bright" black is the same as black on most Spectrum models).
For now, let's see if we can decode one of the screens dumped from the headless emulator into something raylib can display. We can call it "good enough" if we hit 50 frames per second (FPS) without breaking too much of a sweat.
We'll start with some setup:
my $width  = 1024;
my $height = 768;

my $filename = $ARGV[0] // 'tge1.scr';
open my $fh, '<:raw', $filename;
read $fh, my $pixels, 6144;
read $fh, my $attributes, 768;

my $app = Raylib::App->window( $width, $height, 'SCR display' );
$app->fps( 50 );
my $fps = Raylib::Text::FPS->new;

while ( !$app->exiting ) {
    my $tex;
    $app->draw(
        sub {
            $app->clear;
            $tex = scr2tex( $pixels, $attributes );
            $tex->draw;
            $fps->draw;
        }
    );
}
The width and height of the application will be the Spectrum screen dimensions x 4. We start by grabbing the screen we want to display, 'tge1.scr', which contains The Great Escape's menu screen.
After declaring the app instance and setting the desired framerate (for a PAL region computer designed to connect to a TV in 1982), we can start the game loop. This is the same simple game loop you might create for any number of frameworks. Ordinarily there would be some calls to retrieve input, calls to move objects in your game world based on that input, then the drawing routines.
The scr2tex function will turn the Spectrum screen data into an image
"texture"
that raylib can throw at the host's GPU. Note that the texture $tex needs to remain
in scope until after the draw calls are complete, so it is declared outside the
draw call. The texture data is a 32-bit array of Red, Green, Blue, Alpha (RGBA)
values, plus a texture size, expressed as X/Y, which denotes how to constrain
the array. Textures are images which are mapped - rendered onto - 3D shapes.
In our case, they will simply be shown in 2D on the host's screen.
There are a number of options available to us to convert the screen space into the list of RGBA values needed to construct the GPU texture. The Spectrum's video layout is optimised for displaying characters, so we could go character by character, looking up each attribute only once. We could treat the data sequentially, adding RGBA values to the texture in the same order they appear in the Spectrum's screen RAM. We could address the screen RAM in a way that the pixels are processed in the same order as the texture.
my $colours = [
    [ 0x00, 0x00, 0x00 ],
    [ 0x00, 0x00, 0xD7 ],
    # ... More RGB values here
    [ 0xFF, 0xFF, 0x00 ],
    [ 0xFF, 0xFF, 0xFF ],
];

sub rgba( $colour ) {
    join '', map { chr } $colour->@*, 0xFF;
}

sub colour( $attribute, $ink = 0 ) {
    my $colour = $attribute & i( $ink ? 0b00000111 : 0b00111000 );
    $colour = $colour >> ( $ink ? 0 : 3 );
    my $bright = ( $attribute & 0b01000000 ) >> 3;
    rgba( $colours->[ $colour | $bright ] );
}
We can start with some generally useful functions. The $colours array of arrays
contains RGB values for the 8 spectrum colours, and the 8 BRIGHT variants.
The colour function takes an attribute byte and whether we want the ink or
paper colour. It then pulls the relevant colour from the attribute byte,
shifting the bits if required, so it's a number from 0 to 7, then fetches the
bright flag and shifts that so it's 0 or 8. The colour and bright flag are
binary-ORed together to produce a value matching the lookup table $colours.
The bits in the screenshot's pixel array are 1 for ink colour, 0 for paper, so we should be able to pass the pixel value directly into this function and get the correct RGBA value back.
You may have spotted that we're only using 7 bits of the attribute value here.
The remaining bit is the FLASH flag. I'm leaving that as homework for the
reader. Not a good enough excuse? OK, erm ... This emulator will follow web
standards best practice - the <blink> tag was deprecated long ago.
Let's take a look at a first-pass scr2tex:
sub scr2tex( $pixels, $attributes ) {
    my $image;
    my @pixmap = map { [ split '' ] } reorder ( unpack( '(B256)*', $pixels ) );
    my @attribmap = unpack( 'C*', $attributes );

    for my $x ( 0..191 ) {
        for my $y ( 0..255 ) {
            $image .= colour(
                $attribmap[ int( $y / 8 ) + ( int( $x / 8 ) * 32 ) ],
                $pixmap[ $x ][ $y ]
            );
        }
    }

    my $buffer = malloc( length $image );
    my ( $image_ptr ) = scalar_to_buffer( $image );
    memcpy( $buffer, $image_ptr, length $image );
    my $raylib_img = Raylib::FFI::Image->new(
        data   => $buffer,
        format => 7, # PIXELFORMAT_UNCOMPRESSED_R8G8B8A8
        width  => 256,
        height => 192,
        mipmaps => 1,
    );
    Raylib::FFI::ImageResizeNN( $raylib_img, $width, $height );
    Raylib::Image->new( image => $raylib_img )->as_texture;
}
The first step here is to get the pixel and attribute data into a usable
format. Attributes are unpacked into an array of 768 unsigned char values.
Pixels are unpacked into 192 strings, each with 256 characters either '1'
or '0', depending on whether the pixel contains the ink or paper colour.
This is further split, so @pixmap will contain a 2D array of pixel values.
We'll take a look at the function reorder shortly.
For each pixel, the relevant colour value is concatenated onto $image.
The $image is then converted into a texture in a slightly roundabout
fashion. Image loading functions in raylib tend to focus on pulling PNG files
from disk. As we have already constructed the required in-memory representation
of the image, constructing a Raylib::FFI::Image struct with a malloced blob
is probably the quickest path forward.
ImageResizeNN is a nearest-neighbour resize function to bring the image to
final dimensions. The final step is to return the image as a texture - the data
is copied into GPU memory by raylib during this step.
Let's return to the code to take a look at reorder:
sub reorder( @lines ) {
    my @reordered;
    for my $third ( 0..2 ) {
        my $start_line = $third * 64;
        for my $char_line ( 0..7 ) {
            for my $char_offset ( map { $_ * 8 } 0..7 ) {
                my $next_line = $start_line + $char_line + $char_offset;
                $reordered[ $next_line ] =
                    shift @lines;
            }
        }
    }
    return @reordered;
}
This function takes lines of pixels in the order they appear in screen RAM, and returns them in consecutive, or on-screen, order. Thirds of the screen are processed in turn. Each third of the screen contains 8 rows of characters. Characters are 8 pixel rows high. The first eight rows in RAM appear in the order 0, 8, 16, 24, 32, 40, 48, 56. The second 8 are in order 1, 9, 17, 25, and so on up row 63. The second and third segments of the screen proceed similarly, up to row 191.
The result of all this bit-wrangling is as follows:

An initial wave of excitement quickly gives way to the reality of what
we're attempting to do. 7 frames per second is significantly fewer than 50.
A little instrumentation shows that the drawing of the image - looking up
colour values pixel by pixel and concatenating them onto $image - is taking
over 200 milliseconds. The image copying, resizing, etc. to get it into a GPU texture at the
correct dimensions is clocking in at around 4 milliseconds. Skipping the resize
operation reduces this to 100 microseconds or less.
For a 50 FPS target there is a total allocation of 20 milliseconds to generate each frame. This includes any work raylib needs to do, and will need to accommodate our Z80 processor and its I/O callbacks at some point.
There are a number of simple optimisations we can implement here to try speed
things along. Processing the screen pixel by pixel results in 49152 function
calls. If we processed 8 pixels at a time, they could be handled in a single
colour call as they will all have the same attribute byte. This would reduce our call
count to 6144.
Some caching could be useful. For example, if we plan to call colour with
an attribute byte and pixel byte, there are 65,536 possible permutations in the parameters.
This could easily be precomputed and cached without the host breaking a sweat.
Computing the row order in reorder each time could also be helped along with a
lookup table.
It should also be possible to instruct the GPU to resize a texture, rather than performing the resize on the host CPU each frame, then copying the resized image to the GPU.
It's OK, we're still whipping things up! It's still fun! Even though there's a
legit malloc hanging about in there...
Moving on, we can replace the reorder function with an array containing the
order of pixel lines:
my @line_order;
for my $third ( 0..2 ) {
    my $start_line = $third * 64;
    for my $char_line ( 0..7 ) {
        for my $char_offset ( map { $_ * 8 } 0..7 ) {
            push @line_order, $start_line +
                              $char_line +
                              $char_offset;
        }
    }
}
This is the same loop that reorder had, but instead of addressing the pixel
array by line number, it just stores that number.
The colour function has been updated to take an attribute value, plus a byte
containing 8 pixels:
sub colour( $attribute, $pixels ) {
    state @cache;
    $cache[ $attribute << 8 | ord $pixels ] //=
        join '', map {
            my $colour = $attribute & ( $_ ? 0b00000111 : 0b00111000 );
            $colour = $colour >> ( $_ ? 0 : 3 );
            my $bright = ( $attribute & 0b01000000 ) >> 3;
            rgba( $colours->[ $colour | $bright ] );
        } split '', unpack 'B8', $pixels;
}
A cache key is calculated by treating the attribute as the most-significant byte (MSB) of a 16-bit integer, and adding that to the numeric representation of the pixel byte. The rest of the function is much the same as before, except instead of processing a bit at a time, it returns RGBA values for 8 bits.
The scr2tex function will need to be updated for new parameters in colour:
sub scr2tex( $pixels, $attributes ) {
    my @lines = unpack '(a32)*', $pixels;
    my @attribmap = unpack 'C*', $attributes;

    my $image = join '', map {
        my $attrib_idx = int( $_ / 8 ) * 32;
        map {
            colour( $attribmap[ $attrib_idx++ ], $_ )
        } split '', $lines[ $line_order[ $_ ] ]
    } 0..191;

    # ... remainder of this function is largely unchanged
The pixel data is now unpacked into @lines as rows of byte strings with length 32.
The image data is built line-by-line, using the line number to address the
attribute byte and reference the correct line via @line_order.
The allocation of the image struct, sending it to a texture, and so on remains
identical to before, except we no longer resize the image to the final window
dimensions.
The game loop and draw call now look like this:
my $scr_rect = Raylib::FFI::Rectangle->new(
    x      => 0,
    y      => 0,
    width  => 256,
    height => 192
);

my $window_rect = Raylib::FFI::Rectangle->new(
    x      => 0,
    y      => 0,
    width  => $width,
    height => $height
);

while ( !$app->exiting ) {
    my $tex;
    $app->draw(
        sub {
            $app->clear;
            $tex = scr2tex( $pixels, $attributes );
            $tex->draw_pro( $scr_rect, $window_rect );
            $fps->draw;
        }
    );
}
Two rectangles describe the Spectrum screen image dimensions and the desired window dimensions.
These are passed to the draw_pro method, which now performs the resize.
The final step is to warm the cache inside the colour function, to keep the
framerate / idle time somewhat consistent:
for my $attrib ( 0..255 ) {
    for my $pixel ( 0..255 ) {
        colour( $attrib, chr $pixel )
    }
}
With those changes, how does the performance look?
A little instrumentation on the game loop's draw callback indicates a render time of no more than 3.5ms on an 8th Gen mobile i5 running Linux, and no more than 4.5ms on a five year old Ryzen 7 running Windows. This leaves us with around 15ms per frame to play with for the integration of redcode's Z80.
Binding redcode's Z80.
This section assumes a default local installation as described in the libz80 README or Windows DLL file in the current working directory. Loading this into a Platypus instance is simple:
my $lib = $^O eq 'MSWin32'
    ? './Z80.dll'
    : "$ENV{HOME}/.local/lib64/libZ80.so";
my $ffi = FFI::Platypus->new(
    api => 2,
    lib => $lib
);
A significant difference between redcode's Z80 and CPU::Emulator::Z80 is that the former uses callbacks for reading and writing memory addresses - the memory lives in your program, not in the emulation. Converting the binary blob read from the snapshot file into an array should make this nice and simple:
my @memory = unpack 'C*', $rom . $ram;Memory addressing callback functions are now very simple:
sub mem_read( $ctx, $addr ) { $memory[ $addr ] }
sub mem_write( $ctx, $addr, $val ) { $memory[ $addr ] = $val if $addr >= 0x4000 }
The $ctx value here is user-defined. This is usually used to help work around
difficulties in closure support in C - we don't make use of it here. The
address 0x4000 is the lowest RAM address. It's probably not strictly
necessary but checking the address helps guard against write operations to ROM.
The scr2tex function needs some updates to handle the array data:
my @line_nos = 0..191;
sub scr2tex( @memory ) {
    my @pixels = @memory[ 0x4000..0x57FF ];
    my @attribs = @memory[ 0x5800..0x5AFF ];

    my $image = join '', map {
        my $line_idx = $line_order[ $_ ] * 32;
        my $attrib_idx = int( $_ / 8 ) * 32;
        map {
            colour( $attribs[ $attrib_idx++ ], $_ );
        } @pixels[ $line_idx..$line_idx+31 ];
    } @line_nos;

    # ... remainder unchanged
Moving the building of the @line_nos array outside the function is what's
known as "premature optimisation". I'm also crossing my fingers that passing these
named arrays around in function parameters benefits from copy-on-write optimisations. We can revisit
if we miss the framerate target.
There are a couple of simple function signatures we need to declare for memory and I/O port access functions:
$ffi->type( '(opaque,uint16)->uint8' => 'Z80Read' );
$ffi->type( '(opaque,uint16,uint8)->void' => 'Z80Write' );
FFI::Platypus::Record allows us to create an object wrapper for a struct in redcode's Z80. The definition of the object looks much like this:
package TSWZXSEITW::Z80 {
    use FFI::Platypus::Record qw/ record_layout_1 /;
    record_layout_1(
        $ffi,
        opaque   => 'fetch_opcode',
        opaque   => 'fetch',
        opaque   => 'read',
        opaque   => 'write',
        opaque   => 'in',
        opaque   => 'out',
        opaque   => 'nop',
        sint16   => 'ix',
        sint16   => 'iy',
        sint16   => 'pc',
        sint16   => 'sp',
        sint16   => 'xy',
        sint16   => 'af',
        sint16   => 'bc',
        sint16   => 'de',
        sint16   => 'hl',
        sint16   => 'af_',
        sint16   => 'bc_',
        sint16   => 'de_',
        sint16   => 'hl_',
        uint8    => 'options',
    );
}
$ffi->type( 'record(TSWZXSEITW::Z80)' => 'Z80' );
$ffi->attach( z80_execute => [ 'Z80*', 'size_t' ] => 'size_t' );
"TSWZXSEITW" is The Second-Worst ZX Spectrum Emulator in the World.
The record layout in TSWZXSEITW::Z80 has many more members not listed here,
as we're not interested in them. The opaque entries are pointer values we
can cast other things to later, if required.
Once the object is defined, we can bind that to a type, then attach a function
from the library into our namespace - the FFI attach method will make z80_execute available to
us like any other Perl function.
We next need to create some FFI closures to pass as callback functions to
an instance of TSWZXSEITW::Z80.
my $read_closure = $ffi->closure( \&mem_read );
my $write_closure = $ffi->closure( \&mem_write );
my $input_closure = $ffi->closure( \&input );
my $output_closure = $ffi->closure( \&output );

my $read = $ffi->cast( 'Z80Read' => 'opaque', $read_closure );
my $write = $ffi->cast( 'Z80Write' => 'opaque', $write_closure );
my $input = $ffi->cast( 'Z80Read' => 'opaque', $input_closure );
my $output = $ffi->cast( 'Z80Write' => 'opaque', $output_closure );
The casts are necessary as we can't declare the function pointer types in the struct object. The cast will bind the function signature to the closure and return a simple pointer.
The declaration of our Z80 struct looks like this:
my $Z80 = TSWZXSEITW::Z80->new(
    options      => 2 | 8 | 32, # Z80_MODEL_ZILOG_NMOS
    read         => $read,
    fetch_opcode => $read,
    fetch        => $read,
    nop          => $read,
    write        => $write,
    in           => $input,
    out          => $output,
    ix           => $IX,
    iy           => $IY,
    hl           => $HL,
    hl_          => $HL_,
    de           => $DE,
    de_          => $DE_,
    bc           => $BC,
    bc_          => $BC_,
    af           => $AF,
    af_          => $AF_,
    sp           => $SP,
    pc           => 0x72,
);
The options value should match the type of Z80 chip which would have appeared in a
48K Spectrum. It's expressed as magic numbers here becasue I didn't bother
pulling enum values from the header files. We can see a number of members are
set to our callback pointers, and various registers and pointers are set as
before (with some of them becoming combined 16-bit values, e.g. registers A
and F are now AF). The SP/PC hack from the headless version remains.
Final Steps
In order to clock redcode's Z80 (it works on cycles rather than instructions), we need to define a few values:
use constant {
    CYCLES => 3_546_900,
    FPS    => 50
};

my $cycles_per_frame = CYCLES / FPS;
Taking the ZX Spectrum's clock speed of ~3.5MHz and dividing it by the target
framerate gives us the number of clock cycles per frame. We pass this to the
z80_execute function in the Raylib app's main loop, along with our Z80
struct instance:
while ( !$app->exiting ) {
    z80_execute( $Z80, $cycles_per_frame );
The final moving part is keyboard input:
sub get_key_pressed( @keys ) {
    my $shift = 0;
    sum map {
        !Raylib::FFI::IsKeyDown( $_ ) << $shift++
    } @keys;
}

my $input_dispatch = {
    # 0 - 5
    0xf7fe => sub { get_key_pressed( 49..53 ) },
    # 6 - 0
    0xeffe => sub { get_key_pressed( 48, reverse 54..57 ) },
    # ... more half-row mappings here
};

sub input( $ctx, $addr ) {
    my $sub = $input_dispatch->{ $addr };
    $sub ? $sub->() : 0xff;
}
The get_key_pressed function takes a half-row of Spectrum key values which
are passed to raylib's IsKeyDown function. The return value is negated (you
may remember the ULA's data lines are being pulled high, so zero is "on"), and shifted into the
correct bit position for the key.
A dispatch table $input_dispatch wraps this function, mapping
each of the keyboard-related port numbers to a call to get_key_pressed with
the keys as parameters in the required order. We saw the input function cast
to a pointer and stashed in the Z80 struct earlier. This function receives the port
address, finds the function, and executes it if found. The magic numbers in the dispatch table are
a mix of ASCII and raylib values.
The end result is...
A working ZX Spectrum emulator! ... of sorts. It doesn't make sound, I never bothered putting the screen border or flashing in, there's no interrupt handling so lots of games probably don't work (I believe INT1 should be triggered for each screen refresh at least), and the timing is wildly inaccurate. One example of a timing quirk of the Spectrum not implemented here is contended memory. The lower 16K of RAM, which contains the screen, is effectively shared with the ULA. The Z80 is blocked from accessing this RAM while the ULA makes use of it. We're definitely not racing the beam, timing wise.
But it's the journey, not the destination, right? I uploaded a YouTube video of the emulator in action - I managed to nick a guard's uniform. There's also a GitHub gist of the Spectrum emulator's source. Let's wrap this post up while it still fits in 48K.
Conclusion
After some investiagtion and exploration with CPU::Emulator::Z80, a headless and non-interactive ZX Spectrum emulator was implemented. This exhibited some performance issues inconsistent with a realtime and interactive emulator. Nonetheless, it was incredibly instructive, amd helped to validate some assumptions. I can see this module being invaluable as part of a Z80 development environment in future.
We were able to shop around a little for a replacement CPU, outside of CPAN, thanks to the existence of FFI::Platypus. Building experimental and ad-hoc partial bindings is brought into the realm of "fun" through everything being defined in Perl. The development loop is faster and more rewarding, and there's far less context switching than if we had to write Perl, C and XS. Imagining the case where we failed to reach the target FPS, my next steps were probably moving some memory pieces out to a Go library with the expectation I could integrate it back into the emulator with Platypus.
While Raylib::FFI is a work-in-progress, getting up and running with the required facilities was relatively simple. It doesn't take a lot of code to get a graphics window, keyboard input, FPS display and so on. While getting the Spectrum's memory onto the host's screen did need a little wrangling, we were able to start with naive approaches to things and refine from there to speed things up. Starting with naive approaches helped me to solidify the concepts in my mind, and then to know what needed to be optimised (with the help of a little basic instrumentation and profiling).
Don't be afraid of naive implementations. Even if you end up tearing them out, the work you did (and the tests you wrote) will inform future effort.
This post is probably stuffed with glaring inaccuracies, oversimplifications, and outright lies.
I ask your forgiveness for this - I'm just a little guy.
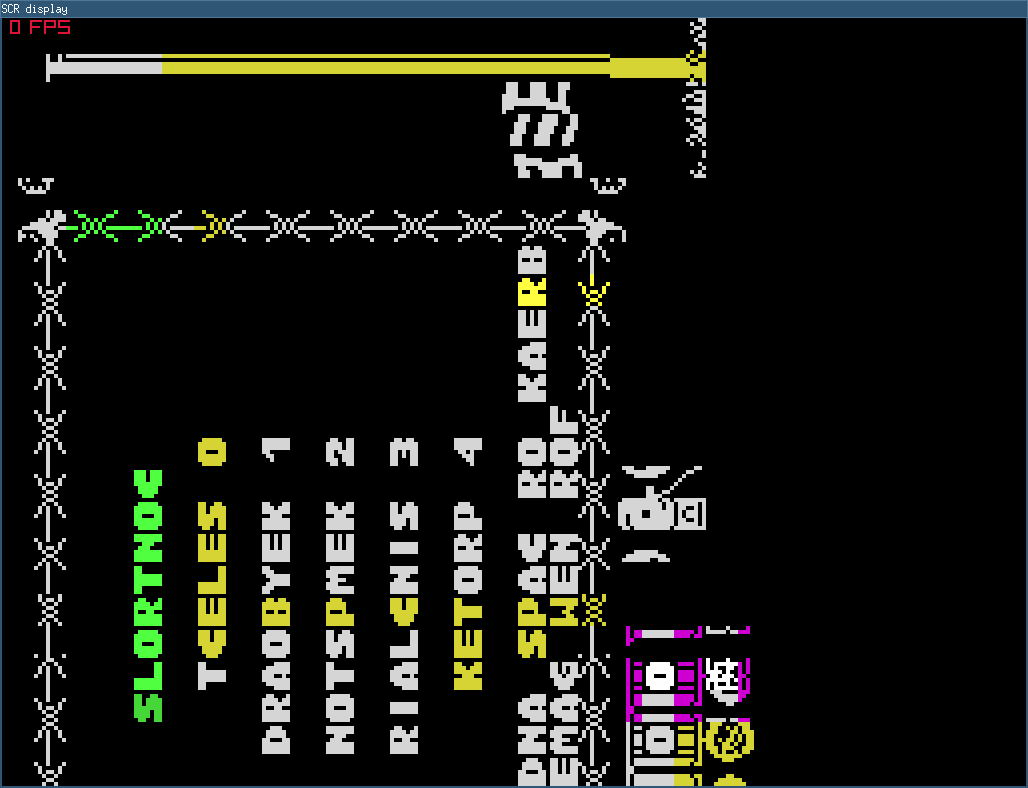
I'll leave you with this amusing/cursed screenshot which exhibits a mix of the wrong
unpack invocation, and some dimensional confusion, to produce "SLORTNOC":
References and Links
FUSE - The Free Unix Spectrum Emulator and libspectrum
ZEsarUX - ZX Second-Emulator And Released for UniX
The ZX Spectrum ULA: How to Design a Microcomputer by Chris Smith
The Complete Spectrum ROM Disassembly by Dr Ian Logan & Dr Frank O'Hara
Programming the Z80 by Rodnay Zaks
ZX Spectrum Assembly. Let's make a game? by Juan Antonio Rubio García